MerMay Challenge! Unicorn Mermaid Drawing Tutorial

Hello Everyone, it’s Lhey here. For today’s post I have something really fun in stored for you. Have you ever heard of the #mermay challenge? If you use the hashtag in your favorite social media outlet, you will see a whole lot of amazing artists participating in this challenge. The idea is to draw mermaids daily in different ways, styles and poses. I think it’s truly a great practice for your creativity and a a fun way to interact and engage with mermaid fans like myself.
So for today’s activity, I thought it’s fun to create our own mermaid character.
I have prepared a Video with step by step instructions from beginning until the end.
Recommended Drawing Materials:
Watercolor Paper
Gold Metallic Marker - Heart of Gold
Grip Plus Mechanical Pencil , Metallic Black 0.7 #130733
Pitt Artist Pens - Brush Tip:
RAW UMBER - 180
ICE BLUE - 148
PALE PINK - 114
PINK MADDER LAKE - 129
Polychromos Color Pencils:
LIGHT GREEN 171
DARK FLESH
MEDIUM FLESH
LIGHT MAGENTA 119
CRIMSON 134
MANGANESE VIOLET 160
BLUE VIOLET 137
EMERALD GREEN 165
PURPLE VIOLET 156
LIGHT PURPLE PINK - 128
Gelatos:
Acqua Dolce
Elderberry
Snow Cone
Alright, now that we have all our supplies ready. Let’s get to creating.
For this activity, I will teach you how I draw my Unicorn Character Blossom. She is darling and is adored by a lot of friends in my community. And today, you & I will turn Blossom the Unicorn into a Blossom the Unicorn Mermaid! Yay! How Fun! Are you ready?
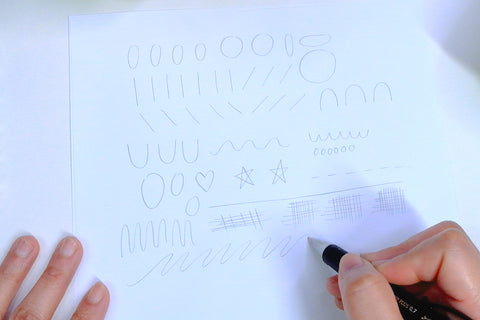
Before I begin any type of drawing for any project. I make sure that I do a little bit of warm-up’s first. You can use a piece of copy paper for this step. And here are just some of my favorite shapes and strokes that I like to do before I get started. You can start with these too.
This step doesn’t really have a time limit. Just keep on going until you feel like you are getting straighter lines, and correct sizes of the shapes that you are creating. It means your brain & hand coordination is on point and you are very well ready to get started.

Once we’re done with doing our doodle warm up’s. Let’s figure out how to draw “BLOSSOM”. I have provided you step by step photos for your reference, but you can watch the video and follow along with me.


Time for line art

Add details in your background scene.

Coloring the background with Gelatos
I wanted to color in the sea weeds first, just in case I made some mess with my gelatos. Just remember to go slow and be mindful of every stroke.

Lightly apply the gelatos straight to your page. I wanted the gradient effect for my background. So I went and use the lightest to the darkest shade gelatos I have.

Use the Water Brush to move the pigments and to blend your colors.

It's time to color in our main character Blossom.


I love using the Polychromos pencils to add details, highlights, & depth to my drawings. I use three shades of the same color. I always go for the lightest shade is my base color, and slowly build my shadows using the medium and the dark, and go back to the medium to the lightest shade burnish and blend all the colors together.

It’s important to add depth and highlights so that your drawings will not appear flat. Creating different values will result to a more 3 dimensional drawings.


For the last step. After you’re done coloring your main character. You can analyze your drawing and decide what kind of finishing touches you would like to add. I love adding some magical touches to my whimsical characters. The metallic pen does the job for me!

And there we have it. Blossom the Unicorn as A Darling Mermaid. Yay! Doesn’t she look so cute?
I hope you enjoyed today’s activity. I also created a coloring page that you can download and print for your personal use. If you will recreate blossom as something else, I would love to see your drawings. Please do not forget to tag us on Social Media @fabercastellusa and @mommylhey
Thank you for playing along. Until next time! Stay Creative & Stay Happy Everyone!
Lhey Ralston

