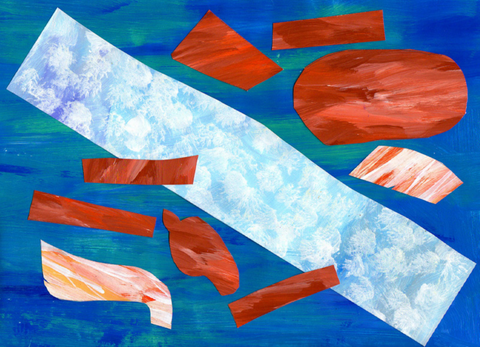
Dream Snow Collage Art Lesson for Kids

Students learn about the artist and writer Eric Carle, and then design a piece of art using his graphic collage style and method.
Recommended Materials:
Tempera Paint
Pencils
Scissors
Glue
White 12x18 Construction Paper
Vocabulary:
Collage, texture, pattern, stencil, freehand, assemble

DREAM SNOW, by Eric Carle, 2000 Dream Snow is a simple and charming story of a farmer who celebrates Christmas and the first magical snowfall with his five farm animals. In this lesson plan, students create a lively and colorful collage-style illustration using any animal they choose from the story.

Creating painted paper:
Preparing the paint colors:
Set up colors of tempera in plastic cup containers with lids for easy storage of leftovers. For a beautiful final artwork result, be an art director and prep by mixing exciting colors; a lime green, turquoise, coral, periwinkle, and raspberry, along with the basics with a little white added for better coverage. Do not set out black, it will be too heavy!
Setting up the stations:
Cover tables with newspaper or re-usable canvas drop-cloths. Designate 4 or 5 stations accommodating 6 or so students. Place 4 or 5 containers of paint at each station (good color combos), along with different size brushes in each container. Set out a few texture tools at each station. Texture tools include anything you can think of, like plastic forks, sponges, and store bought children’s tools and rollers for patterned effects.
Painting:
Gather students around and demonstrate how to paint the entire paper with one color. Then choose a second color and create lines, dots, swirls, etc. Add a third color with a texturing tool, or drag a comb or fork through the wet paint. Spatter contrasting color by flicking a toothbrush, or drizzle thinned down paint in scribbly style. Experiment and be creative! Tell them that the trick is to keep colors separate and artwork “clean” by keeping brushes in their own color containers. Your students will surprise you with unexpected color combinations and amazing design effects. Let paper dry flat on floor and tables.
Sharing:
Cut dried papers in halves or thirds, to create more papers for sorting into basic color categories and easy sharing. A single classroom of students can generate enough paper for projects to last over a year. Never throw away sizable scrapes!

1. Stencil method: have students choose the animal from the story that they would like to make. Next, have them draw the animal on thick paper or card stock. Separate the shapes and cut them out to use as stencils. Allow for overlap.

2. Demonstrate how to lay out the stencils on their chosen papers, then trace and cut them out. Here is a 9 x 12 piece of painted paper for the background, (you could also use colored construction paper), and the pieces of the horse and the ground ready to assemble.

3. Freehand method: You can also encourage confidence and creativity by not using stencils at all, and freehand drawing and cutting the whole thing. You can guide students somewhat on the board with basic shapes and proportions, and draw and cut pieces all together. This loose and relaxed approach can result in surprisingly charming and joyful art.
4. Finally, show students how to assemble their ground and animal parts and glue them in place. How they choose to position the pieces can add a lot of fun and character to the art. Add final touches like the moon, stars, snow, and possibly the decorated tree.

